Monday, December 3, 2012

Minibloq translated to Malay Language!

Minibloq has been translated to Malay Language! We want to say thanks to Hazizul Krilp for his great contribution to the project. The complete translation (including tooltips) is available from the Downloads page as a separate package (this is the direct link). The steps to add this kind of package to Minibloq are pretty simple, and can be found in this post. As always, all the names of the people who is helping with the project are mentioned in the Credits webpageHere we want to share a screenshot showing the work of Hazizul:

Tuesday, November 27, 2012

Minibloq + Romeo + R/C Car

We want to share here the work of Jean-Daniel Planterose (who also helped with the French translation of Minibloq). The project uses the IR remote control capabilities of Minibloq and the PWM blocks to control the motors. Here is the link to the project page, and here is a picture of the hacked car:
Jean-Daniel also added a link to the code and a small video showing how it works:
Thanks JD for this nice example!

Monday, November 12, 2012

Sources released and more news!

Yesterday, we finally released Minibloq's full source code in our Develpoment page (please go to the last section to get it, along with full compilation instructions). We would have preferred do it before, but the code is not so nice in our opinion. We will take this opportunity to talk about our plans and the project status.

Experience with Minibloq

Although Minibloq is in use by a lot of people, it's still something more like an experiment. We are happy to know that a lot of users are children. Minibloq has some unique features specially designed to help children and beginners to reduce the learning curve. Among these are:
  • Contextual block pickers, which only shows to the user the blocks that can fit as parameters for other blocks.
  • Real time error checking.
  • Automatic variable name management (which also works in real time). 
  • And for the advanced users, another useful feature is the real time code generator.
By other way, we are really happy with the community and the contributions from users, such as the translations to 14 languages (some of them still partial translations) and the contributed documentation and examples.

The experiment

So, why do we say that it's an experiment? Well, the mentioned features has proved to work nicely, but Minibloq still lacks a lot of really important things, such as:

  • User blocks, equivalent to functions and procedures.
  • More datatypes.
  • Multihardware subsystem, where the users can easily add their own hardware to the backend.
  • Plug-in system to expand the software itself.
  • User interface features, such as UnDo/ReDo, or multi block selection.
And there are more desirable things to add to the software which means that it still needs heavy development. We thought that we could add some of these features for the next version (v0.82), but after taking some time to design and to explore possibilites, and to analyze the project deeeper, we arrived to the conclusion that we need to make some things from zero. As that's a lot of work, we decided to see other ways of doing things, in easier ways, to reach the goals sooner and better. So we will make major changes in the whole thing. We are studying to move from wxWidgets. It's a really great library, but we think it's time to migrate to other technologies (more on this soon...)

The released sources and the IDE

Now the sources are published. We always sent them to anyone who has requested the sources, but now you can download them with just one click. If you take a look to the last section of our Development page (please go to the last section there) you will alfo find the instructions to compile both under Windows(R) and under GNU/Linux. Finally, we want to say that we worked a lot to publish an all-in-one portable Code::Blocks IDE for Windows(R), with precompiled wxWidgets included (among other things, like the Irrlich open source game engine):
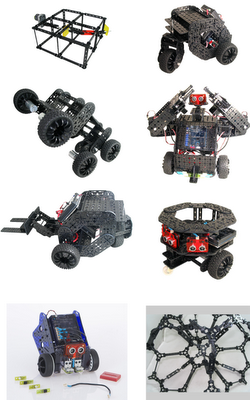
Multiplo

As many of you know, we finished a successful Kickstarter campaign for our new open source robot building system called Multiplo. We are also working on the integration with new hardware related to Multiplo and want to make some improvements specifically designed to improve the user experience when working with robots. But of course, all this new stuff will take time. We are now working on the rewards belonging to this campaign.

The forum and the website

As we said in a post long time ago, we were working on a new website. This is not ready yet and also will take time. Among other things, there will be an improved forum. We will also work to keep spam controlled, which is nearly impossible in the current forum. Some time ago we started to receive an increasing number of spam posts, between 50 and 100 per day. The rate between legitimate posts and spam messages was probably nearly 1 to 300. And since Minibloq is now better documented, and since we did not received much questions via the forum, we decided to close the threads in the current forum. We are sorry for that, but we were not able any more to spend that big quantity of time moderating the forum. We hope to find a better solution in the future.

That said, we want to let you know that we are still here, working hard on the project but making big changes, which we hope will make it much better. But it will take some time.

Thanks!
Julián

Sunday, November 11, 2012

Pequeña guía básica en español

RobotGroup armó una pequeña guía básica en español, tipo tutorial, donde se muestra paso a paso cómo programar las salidas de motor (en aquellas placas que las tienen, tales como los controladoers DuinoBot, o placas Arduino(R) equipadas con un shield de motores). La guía está en PDF y se puede abrir/bajar haciendo un click en la siguiete imagen:

Friday, November 9, 2012

New French documentation (Thanks Jean Pierre!)

We want to say thanks to Jean Pierre Raumer for his new translations to French of Minibloq and Multiplo documenation. Here are some links:
Please note that some of the pictures in these docs may not be visible without internet conection, since the docs may be including them as links.

Jean Pierre also translated Multiplo tutorials (written by Rodolfo Cossovich, and with help of Fabián Novell), and we added them in Multiplo's Doc Center (most of these tutorials include examples made with Minibloq):

I also want to take this opportunity to say thanks to the guys at Sparkfun for their post about Multiplo (where Minibloq was also mentioned), a few weeks ago.

Wednesday, November 7, 2012

Minibloq+Multiplo @ Shanghai Maker Carnival

Multiplo was invited to participate in the Shanghai Maker Carnival 2012. Rodolfo Cossovich was there showing the upcoming Multiplo kits, which can be programmed both with Minibloq and the Arduino IDE:

Sunday, November 4, 2012

Minibloq en la Provincia de San Luis, Argentina

Minibloq está siendo distribuido desde fines del 2011 en escuelas públicas de la Provincia de San Luis, Argentina, en el marco del programa gubernamental Todos a la Robótica. A la fecha, más de 1200 kits Multiplo, producidos por RobotGroup fueron entregados, y están siendo utilizados por chicos de entre 6 y 12 años:


Friday, November 2, 2012

Minibloq en el "Encuentro Linux Curicó 2012", Chile

Hace una semana, pudimos participar del Encuentro Linux 2012, llevado a cabo en la Universidad de Talca en Curicó, Chile. Allí pudimos exponer sobre Minibloq + Multiplo, y hablar de hardware open source. Aquí hay un link al programa del evento.
Queremos agradecer desde aquí la invitación (¡gracias Rogelio!) y la hospitalidad recibidas.

Sunday, September 9, 2012

We are at Kickstarter!

Minibloq is open source software. Arduino(R) and its accesories are open source electronics. Now it's time to have truly open source mechanics. What does this mean? When making mechanical parts, the blueprints are not always enough.  Meet Multiplo: an open building system designed so each part can be reproduced by simple tools, like laser cutters, 3D printers or CNC mills. We call this Fab Lab Compatible and allow users to start making their own parts and share them. No needs for moulds, extrussion, or any other expensive manufacturing techniques. In Multiplo, hacking is welcome! Multiplo parts will be published as open source (DXF files). Please take a look to Multiplo's Kickstarter campaign:

Friday, September 7, 2012

Minibloq translated to Croatian!

Minibloq has been translated to Croatian! We want to say thanks to  Robert Sedak for his great work. He has translated even the tooltips. Here is a screenshot:
You can download the zip file containing the Croatian translation from this link. Please follow the following steps to install it:

1. Uncompress the zip file into a temporal path. For example, if you uncompress this file in C:\Temp, you should end with a folder called C:\Temp\Minibloq.

2. Find Minibloq's path (for example: C:\Program Files (x86)\Minibloq.v0.81.UP2). Inside that directory, you will find the folder Components. Copy the whole Minibloq uncompressed folder (in our example C:\Temp\Minibloq) directly into the Components folder. You will see a message box like this:

3. Click Yes

4. It's possible then that the OS will show another message box like this:
5. Click Continue.

6. Ready! Now you can run Minibloq.

Enjoy!

Thursday, August 30, 2012

Water saving robots in Australia, programmed with Minibloq

Andrew Lawrance told us about a very interesting development he and the students at the Bartle Frere State School are doing. Located in Queensland, Australia, the school won a Reef Guardian "Water Warriors Award" (http://www.environment.gov.au/minister/burke/2011/mr20111111.html) in 2011, for their efforts to reduce water consumption. There, they built an Arduino controlled "water saving robot", and programmed it using Minibloq. Andrew and his students are also working with mobile robots and Minibloq:
Here is a nice article on a local online magazine from Queensland: http://staq.squarespace.com/storage/STAQ38-2%20Digital%20Edition.pdf (the article is in page 4).
Andrew has been contributing to the Minibloq project in other ways. He has made a nice tutorial on how to add custom blocks to Minibloq, and posted it to the forum: http://minibloq.net/forum/viewtopic.php?f=9&t=11. He also developed the first third-party custom block for Minibloq, using the XML interface (plus a bit of  Arduino C/C++ code).

As always, we really like to post interesting things made with Minibloq. If you have a project and want to share it with us, just post about it in the forum, or mention us in Twitter (@juliandasilvag). Thanks!

Tuesday, August 14, 2012

Native Minibloq for Linux released!

Minibloq for Linux was mainly the work of Juan Pizarro, from doingIT, an open source company from Chile. Many thanks Juan! You can download it by clicking on the above image, or go to the Downloads page.
Also, it may be convenient reading the changelog here. We also updated the documentation to explain how to (easily) run Minibloq under Linux.

Multiple-OS version!
This is not just a native Linux version. Now, by downloading one single distribution, you can run natively under different flavors of Linux AND under Windows (you just need to run MinibloqRun.sh in Linux, or MinibloqRun.exe in Windows). Also, this all-in-one package was designed to include all the necessary dependencies (but it's a Beta, so please tell us if you find problems, thanks!). We want to add support for Mac OS X in the future too (help with this task will very welcome...)

Minibloq UpdatePack-2 also released!
And, if you are a Windows user, this version also includes the UpdatePack-2, with the new language packages sent by users (Portuguese, Simplified Chinese and Romanian, plus a partial translation to Italian). If you don't want all the extra Linux stuff, you can download the Windows installer version. So now Minibloq runs in more OSs, and with more language options! Of course, we are always looking for more contributors and translators...

Upcoming v0.82.Beta version
Now we are focused on the next version: the v0.82.Beta. It will take some time, but it will support the adding of third party hardware, among other important features. Plus, we will release the code in a public repository. Right now, everybody can ask for the sources by posting on this  forum thread (we did not released the source code yet because it's still highly hardcoded and because we will also release soon an all-in-one  version of Code::Blocks including all the necessary dependencies to complie Minibloq with a few clicks). More on this soon...

Monday, August 6, 2012

Minibloq translated to Portuguese!


Minibloq has been translated to Portuguese! We want to say thanks to Marco André Ferreira Dias and Anderson Amador Silva from Brazil for their great contribution to the project. The complete translation (including tooltips) will be deployed along with the upcoming UpdatePack-2. We want to take this opportunity to ask for help with more translations. There are currently works in progress to translate Minibloq to  Italian and to Hebrew (but the tooltips for both languages are not finished and yes, we need some volunteers to translate them). Of course, any other translation will be very welcome. All the names of the people who is helping with the project are mentioned in the Credits webpageBy now, here is a screenshot showing the work of Marco Andrés and Anderson Amador:


Monday, July 23, 2012

Minibloq translated to Simplified Chinese!

We want to say thanks to Rodolfo Cossovich and Zhao Qian, from RobotGroup Shanghai (now Multiplo LLC), for the complete translation (including blocks tooltips) to Simplified Chinese:
We are always looking for help with translations, to make Minibloq accesible to more people.

Sunday, July 22, 2012

Cloud IDEs for Arduino

In the last few weeks, two interesting projects has been published, both aimed to program Arduino compatible hardware from Internet, without installation. We think both cloud and native solutions have their pros and cons, but more options are good for the users, so we wanted to mention these environments here. The firstone is codebender. They have given us the possibility of testing it, and it works nicely:


The other one is Wifino, a project that also include a new board, but sadly we could not test it yet.

Thursday, July 12, 2012

Minibloq translation to Romanian finished (thanks Petru)!

The Romanian translation has been finished! We want to say thanks to  Petru Isan  for this great contribution to the project. A partial translation to Romanian was included with the UpdatePack-1. But now, this translation has been finished (including the blocks tooltips), and it will be included along with the next UpdatePack. Here is a screenshot:

Sunday, July 8, 2012

Minibloq+Multiplo en la Provincia de Entre Ríos, Argentina

Hace dos semanas, en ocasión de la Semana de la Ciencia, fuimos invitados por la Dirección de Educación Superior de la Provincia de Entre Ríos, Argentina para hablar de enseñanza tecnológica con Multiplo y Minibloq en las ciudades de Paraná y de Crespo. Allí estuvimos junto a Mónica Paves, Directora de RobotGroup:

Sunday, July 1, 2012

Minibloq v0.81.Beta UpdatePack-1 is here!

As promised, the UpdatePack-1 (UP1 for short) is available now. And it's the result of the constributions of many users (thanks again!). Aside from minor bug fixes (all of them related to the new internationalization subsystem), it includes the following 5 complete language packages (by complete we mean that both the GUI and the blocks tooltips has been translated): French, German, Dutch, Catalan and Galician. We also decided to add 2 partial translations: Romanian and Hebrew. Of course, we still need help to get Minibloq translated to other languages, or to complete the partial translations. Revisions on the current translations are also welcome (we may have bugs, since all this is new...)
Here is a small screen capture from the Properties window (View->Properties menu) once the UP1 is installed:
To get and install the UP1, please these steps (here we are using Windows 7, but it should be even simpler in other Windows versions):
  1. Donwload the UpdatePack-1 from here.
  2. Now you have to decompress it inside your current Minibloq.v0.81.Beta installation path as shown in the images below:


  3. Now the operating system will ask if you want to replace the files with the same name: please just say Yes:
  4. And again, the OS will ask something (this time, if you want to merge some folders with the same name). And again: please say Yes:
  5. And yes: once again, the OS will ask if you are sure to replace some files. And once again, please press Copy and Replace:
  6. And finally, the OS will ask to you for administrator permission. Please press the  Continue button:
Finally, please remember that if you have any question or idea about internationalization, you can always post to this forum thread.

Thursday, June 28, 2012

Minibloq translated to French!

Well, I'm happy with the response we had from the community. Now the French translation is here, and we will release in less than a week the first UpdatePack. This translation was the work of two persons: Jean-Daniel Planterose and Samuel Liaigre. I want to say thanks to them. Here is a small screenshot of the upcoming Minibloq.v0.81 with the UpdatePack-1:

Tuesday, June 26, 2012

Minibloq translated to German (thanks Erik)!

More translations are coming, and faster! This time, we want to say thanks to Erik Hermann for his nice work translating Minibloq to German. As this translation is complete (it includes the GUI itself and the tooltips, and even the HTML helpfiles) it will be available in the upcoming UpdatePack-1.  As always, any translation is very welcome, even partial translations. There are other works in progress to translate Minibloq to French, Hebrew, Romanian and Chinese. Here is a small screenshot of the German translation:

Monday, June 25, 2012

Minibloq translated to Dutch (Nederlands, thanks Gijs)!

We want to thanks Gijs Noorlander for his great work translating Minibloq to Dutch. Gijs also manages the mirror from Holland to download Minibloq. This mirror has become the main source to get the software. He runs a blog too (here is a post about Minibloq). Gijs' translation, which includes not only the GUI, but also the tooltips and helpfiles will be available in the upcoming UpdatePack-1 (soon!).
Finally, I want to mention that Gijs sent an email explaining a better way to manage the bunch of .po files when translating the tooltips. I posted it to a forum thread here.
As always, any help regarding translations is very welcome. We would really like to see Minibloq available in as many languages as possible.

Thursday, June 21, 2012

New tutorial: How to translate Minibloq

As promised, here is the tutorial about how to translate the new Minibloq.v0.81.Beta to a new language (of course, we are always looking for translators!). This is a fragment of the new Minibloq's Developers Guide (still under construction), where we describe (briefely by now) how to translate, customize the GUI, add new blocks and in the near future, how to compile Minibloq both under Linux and Windows:


1. How to translate Minibloq
Since the version v0.81.Beta, Minibloq supports internationalization (i18n) / localization (i10n). This brief tutorial explains how to translate Minibloq, using open source tools. Before start translating, you will need to:
  1. Download the last Minibloq version from the downloads page.
  2. Install Minibloq in your computer. For development purposes, it's highly recommended to install it in a directory where you can freely modify files, instead of the default C:\Program Files (or C:\Program Files (x86) folder. For example, in Windows 7, the Program Files folder is protected. So it will be better to install Minibloq elsewhere, in some temporal dir where you can write, copy, delete or edit files without administrative permissions.
  3. Download Poedit from http://poedit.net (we used the version 1.4.6 for all our internal work).
1.1. Translating the GUI
The first thing to be translated is the GUI itself. This task is relatively easy, by following these steps:
  1. Every language has an international 2 letters code, called ISO 639-1. You will need to find your language code first. You can go to this link for that:  http://en.wikipedia.org/wiki/List_of_ISO_639-1_codes
  2. In Minibloq's installation path (for example C:\Program Files (x86)\Minibloq.v0.81.Beta), go to the following folder: Components\Minibloq\v1.0\GUI\Texts, and make a copy of the files en.po and en.Metadata.po.
  3. Now rename both new files (the copies you just made) using your 2 letters language code, instead of the English code "en". For example: Supose we are translating to Spanish. The code for Spanish is "es", so you will end with a file named es.po and another named es.Metadata.po (note: the names are case sensitive, so you must take care of using exactly these names).
  4. Open the Metada "po" file (ie, en.Metadata.po for English, es.Metadata.po for Spanish, etc.) with a raw text editor (in Windows you can even use the Notepad) and change the "en" code in the following line by your new language code:

     msgid "en.Name"
    

    For example, for Spanish, you will end with a line like this:

     msgid "es.Name"
    
  5. Now open the Metadata file with Poedit and change the language name ("English" in this case) by the new language name, but written in the new language itself. For example, for Spanish, it will be "Español":
  6. In Poedit, press the Save button (or go to the menu File->Save). This will not only save the .po file, but will also generate the .mo file, which is the compiled, portable, OS independent file that Minibloq will need to work (but please don't delete the .po file, it will be deployed with Minibloq also!)
  7. Now open the file xx.po with Poedit (where xx is your language code). In our example with Spanish, it will be the es.po file. Here, you can start translating each text string with the Poedit software. Poedit have, among other features, support for nearly any charset out there. Here is a screenshot with the Spanish file:
  8. Every time you advance with the translation, it's good to press the save button. As before, it will generate the .mo file also. Once you finish, you will have for files: xx.Metadata.po, xx.Metadata.mo, xx.po and xx.mo (where "xx" is your language code).

  9. Now you can test the new language files without restarting Minibloq. Just go to the View->Properties menu and press the Reload languages button. If everything is fine, your new language must be listed in the Language combobox:

1.2. Translating blocks' tooltips
Now let's translate the tooltips for the blocks. As Minibloq is modular and every user can add his own blocks, each block has its own tooltip files. These files are located in the subdir Doc of each block directory (the blocks directories are here: Components\Minibloq\Lib\CPP\Blocks). So, inside each Doc subdir you will find standard .po files that can be translated easily with Poedit, and saved to .mo. You just need to open them with Poedit, change the tooltip string and save it. Here is a screenshot of Poedit with a .po file:

 1.3. Translating help files
The help files do not involve any special program or procedure to be translated. They are just plain HTML files, and they can be edited and translated with any decent HMTL editor. There are only three important things regarding help files:
  1. You must keep the names of the files, in English, just as they are now.
  2. You will need to add the directory with the help files for your language, even if you don't translate them. If you don't do this, Minibloq may show an error dialog box when you select your language or  when you start the application. If you will not translate the files, our advice is just to copy the English help files directory (called simply "en"), and renaming it. The name must be the 2 letters code (ISO 639-1) mentioned above.
  3. If you translate the files, try to use a plain text editor, or a good HTML editor which does not add overhead, nor hidden characters.
The help files are in the following Minibloq's subdir: Components\Minibloq\v1.0\Doc

Wednesday, June 20, 2012

Continuous rotation servo with user defined block

Antonio Lomba, from Galicia, has sent this article, which explains how to use continuous rotation servos with Minibloq and user defined blocks (this is the original post from his blog (Galician): http://www.tecnoloxia.com/index.php/control/224-motor-servo-de-rotacion-continua-con-minibloq.html):

Continuous rotation servos work with small electric pulses. According to the duration of the pulses, the servo rotates clockwise, counterclockwise, or remain stoped. To drive this kind of servomotors is necessary to know it's working characteristics.

For example, for a S35/STD de GWS servo, the manufacturer recommends 0.9 ms pulses to rotate clockwise, 1.5 ms pulses to brake the motor, and de 2.1 ms pulses rotate it counterclockwise. It's also important to control the signal period, which is the total sign time taking into account both the high and the low pulse. The recommended period to obtain the optimal rotation speed is between 16 and 23 ms.


To connect the motor to an Arduino Uno board, we will need to take a look to the colours in the conexion cable, connecting as showed in the following image (brown cable = GND, red cable = 5V and yellow cable for the control pin):
 
The basic programs to control the continuous rotation of the servo both clockwise and counterclockwise (using the digital I/O pin D3) are shown below. The delay times are expressed in microseconds. To do this it was necessary to make a new block (called  delayMicroseconds) and add it to Minibloq. This is because the delay block that comes with Minibloq manages only milliseconds, so it was not possible to program 1.5 millisecond pulses with it:
The delayMicroseconds is a user defined block, which was created using the delay block as the base. In the new Minibloq's Developers Guide we explain, among other tips, how to create this kind of blocks.

Servo de rotación continua con bloque definido por el usuario

Antonio Lomba, desde Galicia, nos ha enviado este artículo que explica cómo utilizar servos de rotación continua con Minibloq y bloques definidos por el usuario (ésta es la versión resumida del original http://www.tecnoloxia.com/index.php/control/224-motor-servo-de-rotacion-continua-con-minibloq.html):

Los motores servo de rotación continua funcionan al recibir pulsos eléctricos. Según la duración del pulso el servo girará en uno u otro sentido, o permanecerá parado. Para gobernar este tipo de motores es necesario conocer sus características de funcionamiento.

Para un servo modelo S35/STD de GWS el fabricante recomienda pulsos de 0,9 ms para conseguir el giro en el sentido de las agujas del reloj, pulsos de 1,5 ms para bloquear el motor en una posición y mantenerlo parado, y pulsos de 2,1 ms para que gire en el sentido antihorario. También hay que controlar la duración del período, que es el tiempo total de la zona activa de la señal y la zona inactiva. La duración del período recomendada para conseguir una velocidad óptima está entre 16 y 23 ms.

Para conectar el motor en una controladora Arduino Uno tendremos en cuenta los colores de los cables de conexión del motor y lo haremos tal como se indica en la imagen. El cable marrón para GND, el cable rojo a 5V y el cable amarillo para el pin de control digital:

 
Los programas básicos de control para el giro continuo en ambos sentidos, utilizando el pin de salida digital D3 para el control, son los que se muestran a continuación. Los tiempos programados en Minibloq están en microsegundos. Para ello fue necesario incorporar un nuevo bloque a Minibloq, se trata del bloque delayMicroseconds. El bloque delay que trae por defecto el programa maneja el tiempo en milisegundos y con este bloque no era posible programar la parada del motor con impulsos de 1,5 milisegundos, ya que el bloque no admite números decimales.
El bloque delayMicroseconds es un bloque definido por el usuario, partiendo precisamente del bloque delay. En la nueva Guía de Desarrolladores de Minibloq (en inglés) se explica, entre otras cosas, cómo crear este tipo de bloques.

Control de motor servo de rotación continua (galego)

Antonio Lomba, dende Galicia, enviounos este artigo que explica a utilización de servos de rotación continua con Minibloq e bloques definidos polo usuario:

Os motores servo de rotación continua funcionan ao recibir pulsos eléctricos. Dependendo la duración do sinal activo o servo xirará nun ou noutro sentido, ou permanecerá parado. Para gobernar este tipo de motores é necesario coñecer as súas características de funcionamento.

Para un servo modelo S35/STDde GWS o fabricante recomenda pulsos de 0,9 ms para conseguir o xiro no sentido das agullas do reloxo, pulsos de 1,5 ms para bloquear o motor nunha posición e mantelo parado, e pulsos de 2,1 ms para que xire no sentido contrario das agullas do reloxo. Tamén se debe controlar a duración do período, que é o tempo total entre a zona activa do sinal e a zona inactiva. A duración do período recomendada para conseguir unha velocidade óptima está entre 16 e 23 ms.

Para conectar o motor nunha controladora Arduino Uno teremos en conta as cores dos cables de conexión do motor e farémolo tal como se indica na imaxe. O cable marrón para GND, o cable vermello a 5V e o cable amarelo para o pin de control dixital:
 
Os programas básicos de control para xiro continuo a dereita e xiro continuo a esquerda, utilizando o pin de saída dixital D3 para o control, son os que se mostran a continuación. Hai que facer notar que os tempos que están programados en Minibloq son en microsegundos. Para elo foi necesario incorporar un bloque novo ao Minibloq, trátase do bloque “delayMicroseconds”. O bloque “delay” que trae por defecto manexa o tempo en milisegundos e con este bloque non era posible programar a parada do motor con impulsos de 1,5 milisegundos xa que este bloque non admite números decimais.
O bloque delayMicroseconds é un bloque definido polo usuario, partindo precisamente do bloque delay. Na nova Guía de Desenvolvedores de Minibloq (en inglés) explícase, entre outras cousas, como crear este típo de bloques.


Sunday, June 17, 2012

How to add user defined blocks!

We are working on the new Minibloq's Developers Guide (which is still under construction). Here is a fragment of that guide, which describes the basics of writing new blocks for Minibloq:

Minibloq loads the blocks at runtime. All the blocks are defined in XML files. In the future, we plan to document better how to add custom blocks. Also, the block syntax will still evolve (there is still a lot of work to do). But even now, it's possible for the users to write their own custom blocks. Although we are working hard in Minibloq's documentation, by now, we can give here just an example. There is also a nice tutorial in the forum, written by Andrew Lawrance, with more complex explanations about this topic. So here is the example:

Example: Adding a delayMicroseconds() block
Let's add a new block to use the delayMicroseconds() function from the Arduino API. To do this, we will start from a block that already exists. This block is very similar to the one we want to create: It's the delay block. So we just need to follow these small steps:
  1. Make a copy of the  folder which belongs to the delay block  (you will find it in the Components\Minibloq\Lib\CPP\Blocks subfolder, inside Minibloq's installation path). The delay block folder's name is action.010.0040.delay.Arduino.v1.0
  2. Rename the new folder. For example, this may be a good name:  action.010.0050.delay_us.Arduino.v1.0
  3. Inside that folder, you will find the file main.block. Open it with a raw editor (like Notepad++, for example).
  4. Change the following line:
     delay

    by this:
     delayMicroseconds
  5. Now change this another line (and then save the file):
     delay

    by this:
     delayMicroseconds
  6. Now you have to tell Minibloq which boards will load this block when they are selected (every block can be compatible or incompatible with a board, and is the Developer's task to decide this). For this, you will need to create an empty  txt file (in future versions these files will have some content, but right now they are just empty raw text files) named with the same name as the folder where you created the new block, followed by the .rel extension. In our example, this file will be named action.010.0050.delay_ms.Arduino.v1.0.rel
  7. Copy that file to the Matrix subdirectories of all the boards (or targets) that you want to load that block. For example, to add the block to the Arduino Uno board, you will need to copy that file in the  following subdirectory (inside Minibloq's installation path): Components\Minibloq\Lib\CPP\Targets\ArduinoUNO_Arduino.v1.0\Matrix
  8. Now select your board. If you have already selected it, just press the Reload blocks button in the Hardware window (this window can be made visible with the menu View->Hardware). Your Actions picker must be something like this (please note the two "delay" blocks):
Note that we did not change the block's images (for the block itself, or for the picker), nor the structure of the block (regarding parameters, for example). Even the tooltip was untouched. This is just a very basic example, now you can dig into the XML structure of the blocks, and as Minibloq does not require to reinitialize the application, you can quickly see the changes of your block using the Reload blocks button. We will improve the blocks' XML documentation when the syntax becomes more finished, but by the moment, we encourage you to take a look to the XML definitions of more complex blocks, such as the while block (in the action.010.0010.while.CPP.v1.0 subdir), the buzzer (action.020.0050.Buzzer.Arduino.v1.0) or the Motor block (action.020.0060.Motor.Arduino.v1.0).


Friday, June 15, 2012

¡Minibloq traducido al gallego (galego)!

Desde que se agregó el soporte para internacionalización (i18n), en la versión v0.81.Beta, se han sumado más personas de diferentes partes del mundo a colaborar con el proyecto. Ahora ha sido el Profesor Ramón Quiroga Barro quien nos ha enviado la traducción completa al gallego (incluyendo los tooltips de los bloques y los archivos HTML de la ventana de ayuda). Para mí resulta un lenguaje muy querido, ya que mi padre nació en La Coruña, Galicia. Aprovecho también aquí a agradecer la gestión de Antonio Lomba, quien nos contactó con Ramón, y quien además lleva adelante el blog http://www.tecnoloxia.com (en el que también hay tutoriales de robótica con Minibloq escritos en gallego).
Escribimos hace poco acerca de las actividades de Antonio con Minibloq en este post, donde se lo puede ver junto a alumnos y colegas. Finalmente, queremos mencionar una vez más que estamos trabajando mucho sobre la próxima apertura completa de los fuentes de Minibloq (los cuales siempre los pueden pedir y los enviamos por mail), y en la documentación para desarrolladores. Si bien ésta está aún en construcción, ya hay allí una buena introducción de cómo traducir completamente Minibloq a diferentes idiomas. ¡Estamos buscando traductores!